Resin fissure sealant
Resin fissure sealant application technique
Fissure sealants must be placed with careful attention to technique if they are to show good long-term retention. However, even well-placed sealants wear or are lost over time. Therefore, they must be monitored and topped up with additional resin if they wear sufficiently to expose fissures.
Clean the tooth to ensure it is free from obvious debris. This can involve wiping the tooth with a cotton wool pellet, cleaning with toothbrush with no paste, using a bristle brush with prophy paste or gently pulling a probe through the fissures to remove debris – DO NOT push into the fissures as this will cause irreversible damage to the enamel. Use of a 3-in-1 syringe alone is usually insufficient to clean fissures if debris is present.
Check the air line is free from water by blowing air onto the mirror surface to reveal any water contamination.
Isolate the tooth using cotton wool rolls, mouth mirror and saliva ejector and use dry guard if appropriate.
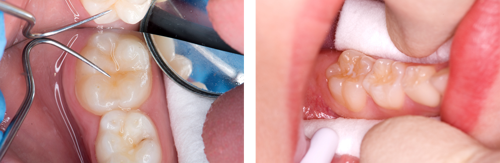
Images showing teeth being cleaned (left), and isolated (right) prior to fissure sealant application
Etch the tooth.
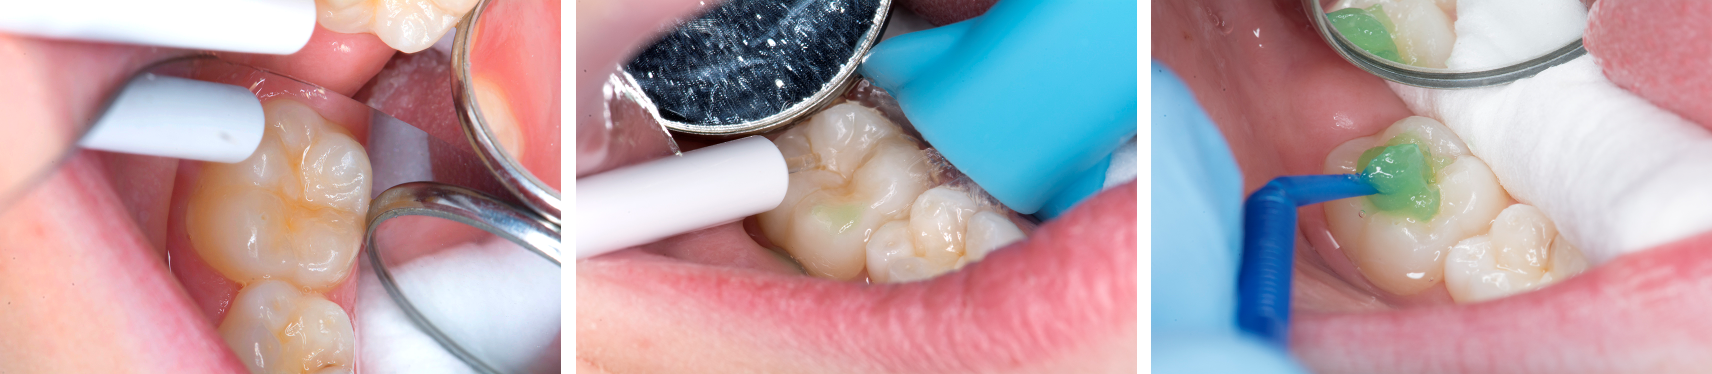
Images illustrating tooth etching:
- dry the tooth to avoid diluting the etch (left);
- apply the phosphoric acid etch (not self-etch products) for 30 seconds (centre);
- wash the etch, positioning the high-volume aspirator so that the water will flow off the tooth into the aspirator (right).
Apply the sealant.
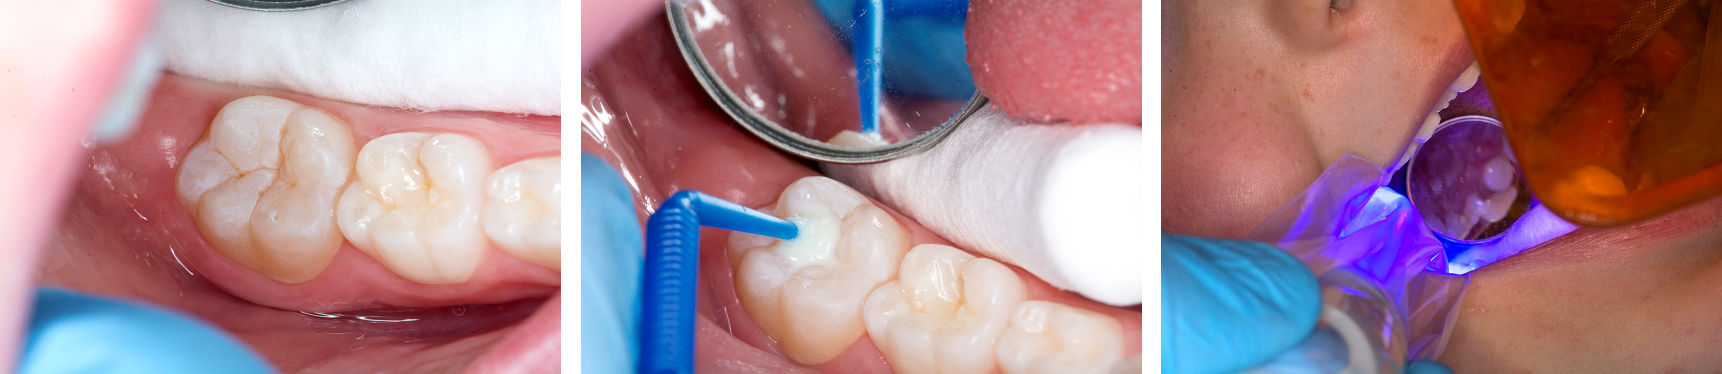
Images illustrating sealant application:
- avoid moisture contamination of the tooth when changing cotton wool rolls; dry the tooth surface, until the entire surface is frosty (left)
- apply resin to etched enamel, ensuring the resin flows without air inclusions to cover approximately a third of the incline of the cusp - do not allow resin to overflow into gingival sulcus as this might compromise the seal (centre)
- light cure the sealant (right)
Check the sealant.
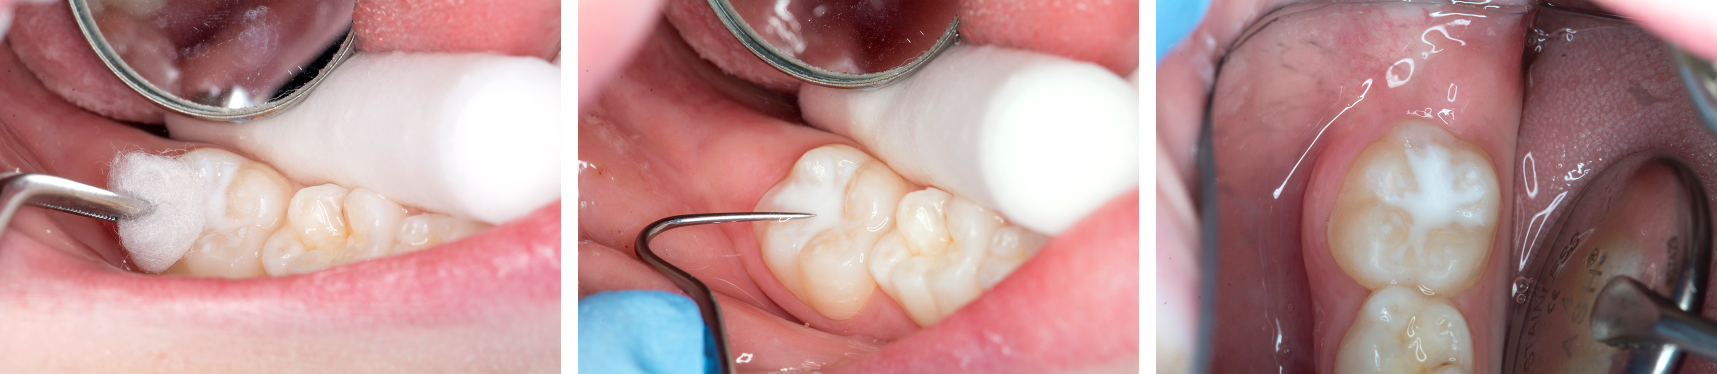
Image illustrating sealant checking:
- wipe the air-inhibited layer from the surface of the sealant as children find the taste distressing (left)
- check for flash and the integrity of the sealant with a probe - if the sealant can be picked off with a probe, then it is almost certainly leaking and needs to be removed (centre)
- completed sealant (right)
Active surveillance of fissure sealants over time
A fissure sealant is only effective when all the fissures are fully covered by resin. Fissures should be monitored at each recall visit and fissure sealants maintained.75
Visually check fissure sealants.

Image showing visual check of a fissure sealant at recall visit.
- Note that with clear sealants, opalescence visible at the sealant/tooth interface usually indicates leakage and demineralisation. This sealant should be removed.
Physically check the perimeter of all fissure sealants with a probe for integrity and adherence.
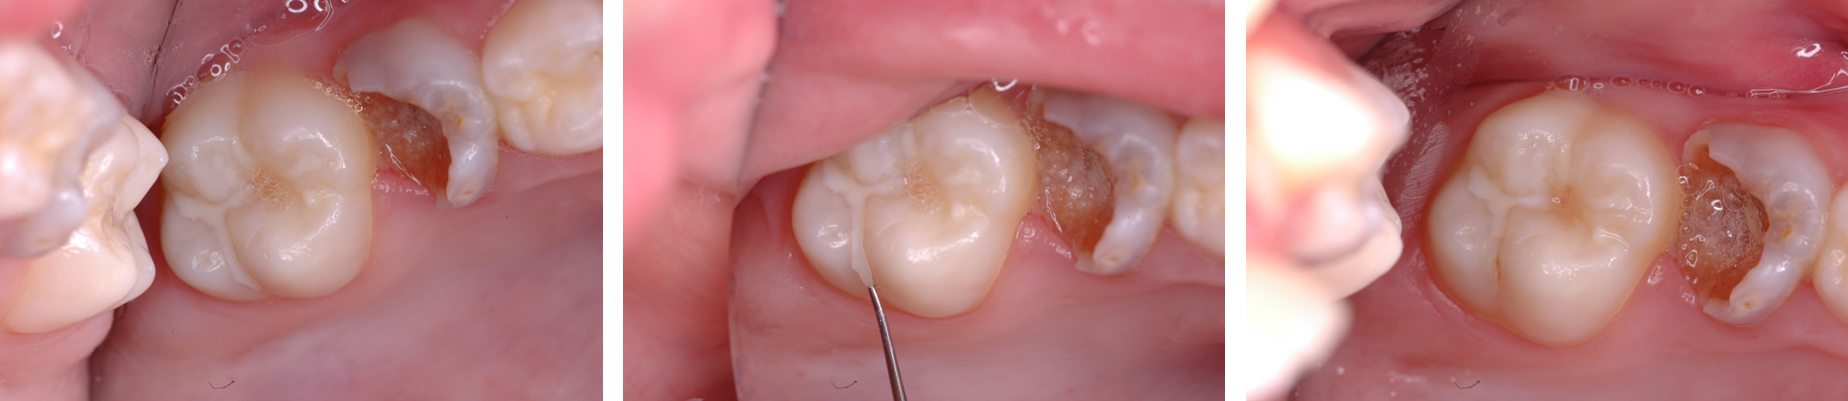
Images showing physical check of a fissure sealant at recall visit:
- an apparently sound fissure sealant at recall visit (left);
- probe inserted under palatal extension, which lifts away (centre);
- a stained fissure is revealed (right).
Top up/repair any fissure sealants as required.
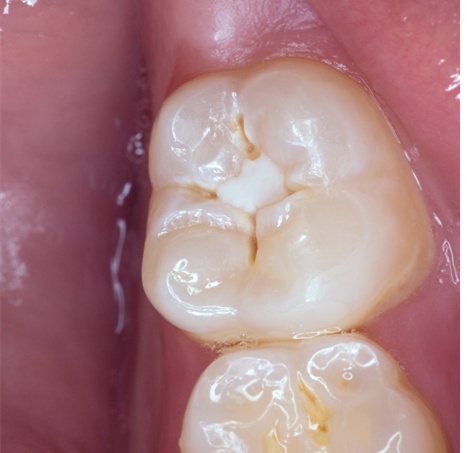
Image showing a worn sealant where exposed fissures are now carious.
- Failure to monitor and maintain sealants can allow caries to develop that could have been prevented.